Installation
The installation requires a few steps:
- File Permissions - some folders are written into and their permissions need to be configured properly
- Database Setup - right now, only MySQL (or its offshoots, like MariaDB or Percona are supported). Create the credentials for the database using either the command line or the cPanel Database Wizard.
- Composer Install - only if you have cloned it from git or downloaded the "raw" zip/tar and not a release or distributed version
- Running the installer - This is a web interface, through which you can also import your older phpvms 2.x or 5.x install
1. File Permissions
Adjust your file permissions to have the proper owner, but also read/write
permissions (775) for:
bootstrapbootstrap/cachestorage/logsstorage/framework/cachestorage/framework/sessionstorage/framework/views
2. Database Setup
Before running the install, you need to configure the database with the database itself and the credentials. Refer to your hosts documentation for specifics - the database name, username and password here are just examples, replace them with your own. This example is for MySQL:
Character Set and Collation If you're using a non-English language, make sure
that you're setting the CHARACTER SET and COLLATE properly (see below for
the utf8 values). By default it's latin which would result in corrupted
characters
CREATE DATABASE IF NOT EXISTS `phpvms` CHARACTER SET UTF8 COLLATE utf8_unicode_ci;
CREATE USER 'phpvms'@'localhost' IDENTIFIED BY 'password';
GRANT ALL PRIVILEGES ON phpvms.* TO 'phpvms'@'localhost';
FLUSH PRIVILEGES;
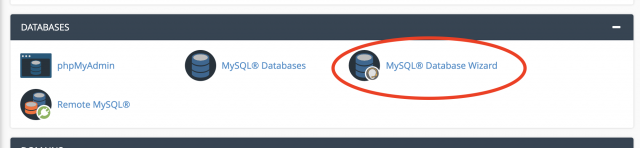
Using the cPanel Database Wizard
You can also use the cPanel Wizard to create the credentials prior to install
3. Composer Install
If you've downloaded a release or dev tar/zip from the downloads section, you don't need this. You only need this if you've cloned the repository
Update the composer dependencies; this will download and update the vendor
folder:
cd /path/to/phpvms
composer install
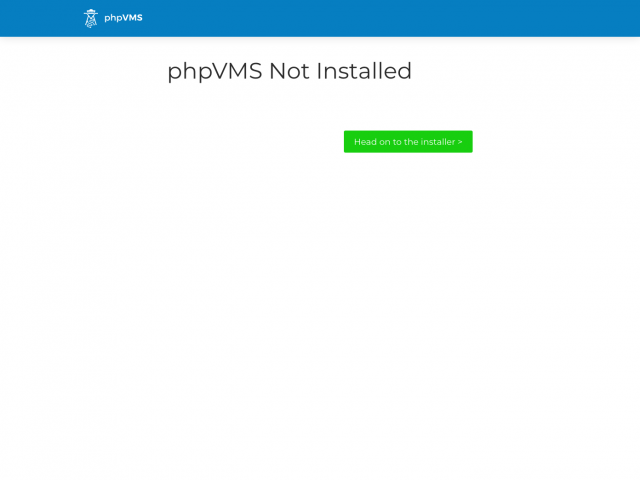
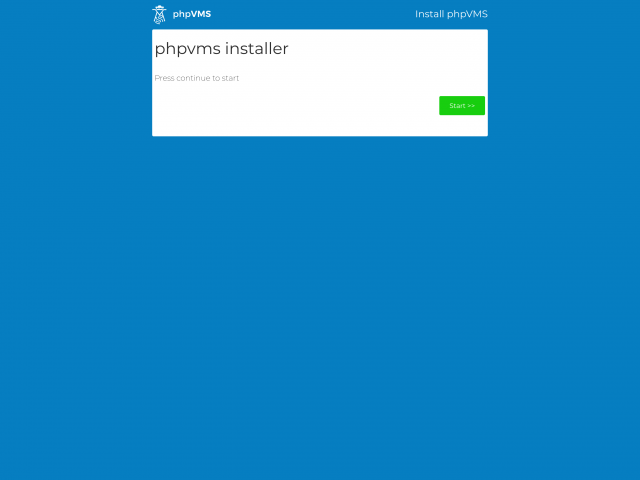
4. Running the Installer
There isn't a setup folder in the tar file. It's done as a Laravel route,
which serves to see that your webserver/htaccess files are working correctly.
Once you go to your site, you'll see a page like this, click to proceed to the installer.
After clicking next, you'll see the requirements check page. The installer will only let you proceeed if all of the requirements are met.

The next page brings you to the database setup page. Select MySQL (sqlite
requires some extra configuration)
- Enter the name of your site and the URL
- Enter your database credentials.
- These are the credentials created above
- Contact your host for the correct database server address. Usually it is
localhostor127.0.0.1but it might be different - You can test to make sure they're working by clicking the "Test Database Credentials" button

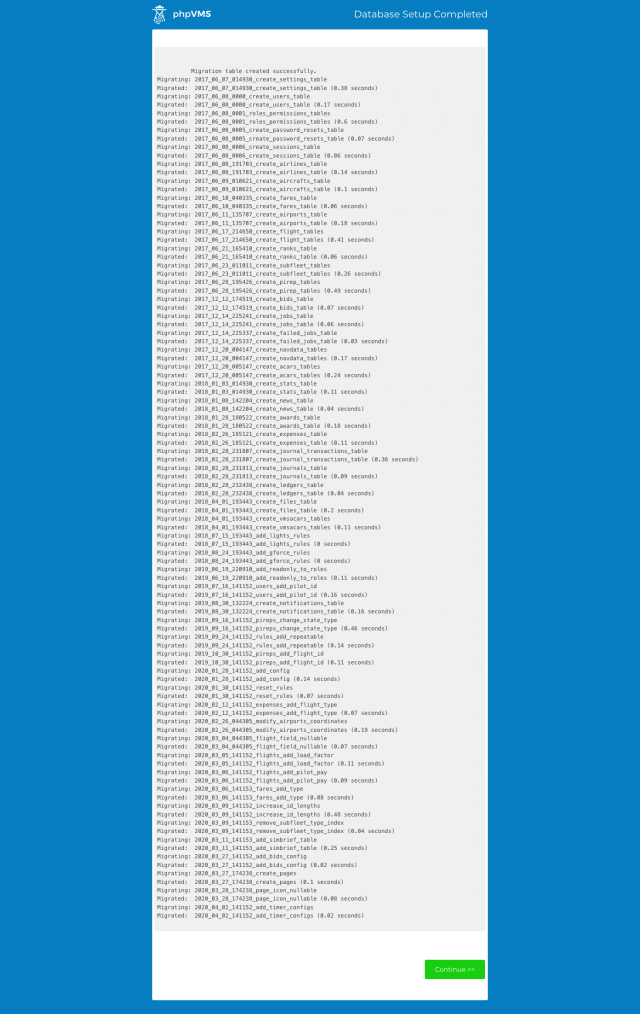
After clicking "Setup Database", you'll see the installation screen. Hit next to proceed:
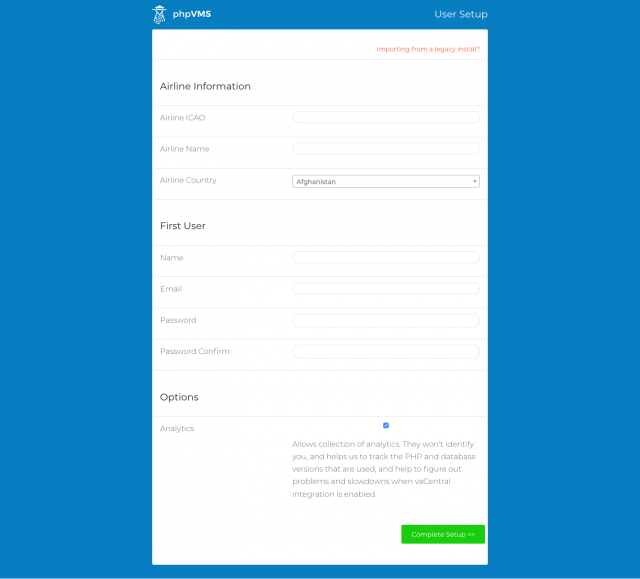
New Install
You'll be brought to the initial setup screen. There is an option here to update yourCreate your first airline here, along with your user and password. This will be automatically made as an admin user.
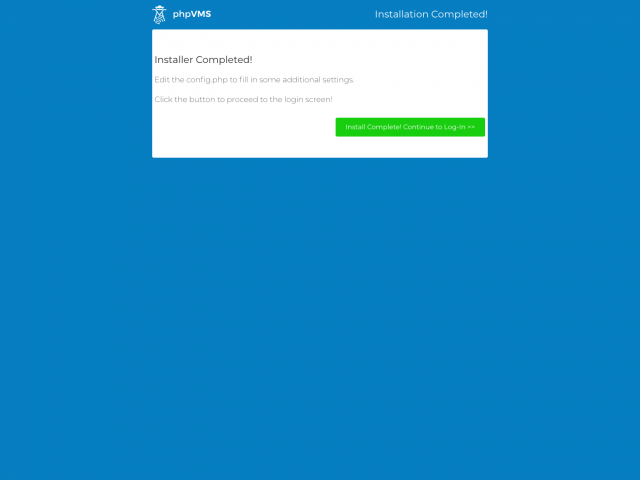
After setting that up, you'll see the completion screen, where you can click next and proceed to login. You'll see your dashboard after logging in, and the installation is complete!
Upgrading from legacy
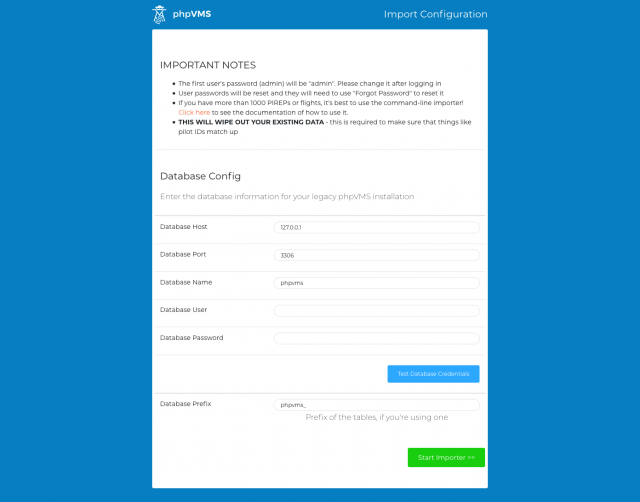
For the database information, enter the credentials and information to your old database